
Petersfield Framing News
Items filtered by date: May 2013
Straightening out-of-square tapestries and embroideries
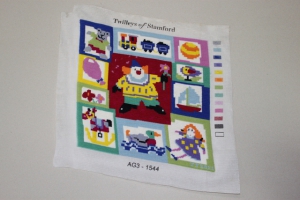
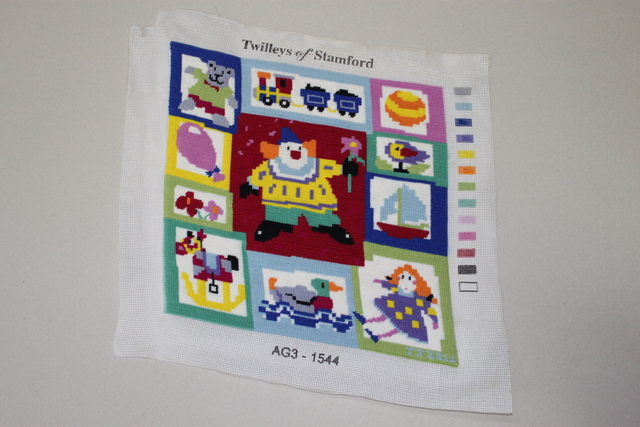
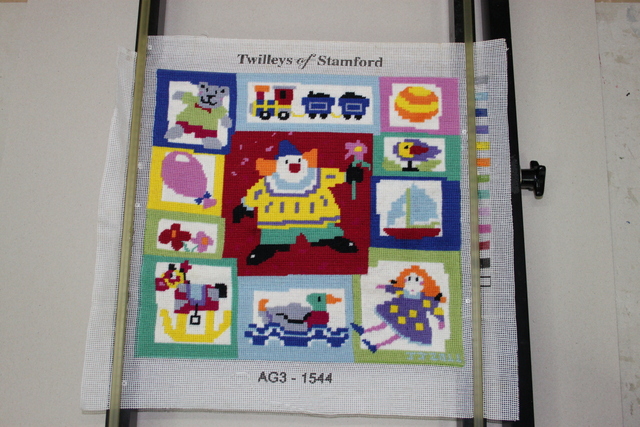
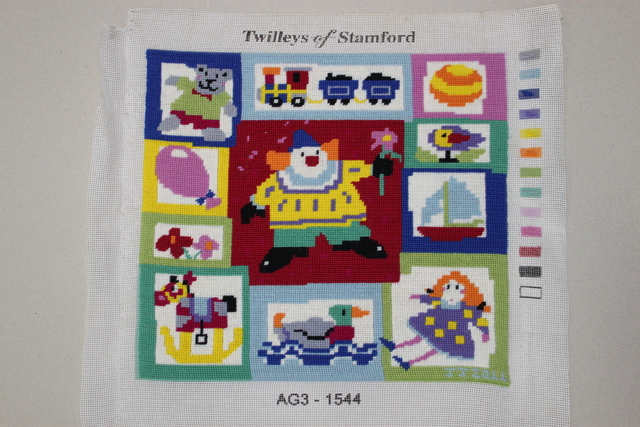
We frame quite a few pieces of textile work such as embroideries, tapestries, counted cross stitch and needlepoint to name a few of the most popular items. It is an area of picture framing that we particularly enjoy working with as we have such a lot of very talented embroiderers as customers at the Petersfield Framing Studios. You can also see a page dedicated to how we lace embroideries or tapestries over acid free board to ensure the work is both preserved and easily reversible. The vast majority of the embroideries or tapestries that we frame need to be stretched over a suitable acid free board. Quite often the textile work is stitched over a purpose-made stretcher by the customer which helps to keep the material square whilst the embroidery or tapestry image is being created. However this isn't always the case as even embroderies that have used a stretcher bar are still out of square when they come into our workshop. The most extreme cases tend to be work on tapestry canvas as the stitches tend to be all pointing in one way that leads to a natural parallelogram effect. Here are some examples of some out of square tapestries and embroideries that have come into the workshop recently.

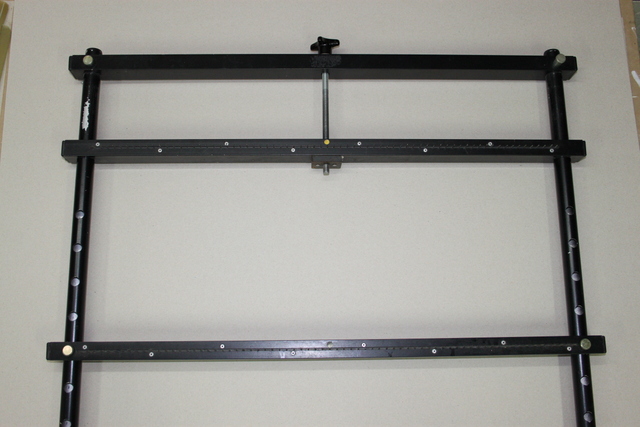
These can be straightened with a steam iron but you need to be very careful and also very patient as the process can be very time consuming. Alternatively we use a machine designded for the purpose. The machine looks a little like a medieval torture device (this could well have been where the idea came from!) and is based on a rack system which can be slowly enlarged by tightening the screw at the top of the photo to gently straighten the tapestry or embroidery.
The work on textile is attached to a row of metal points on one row of the stretching machine.
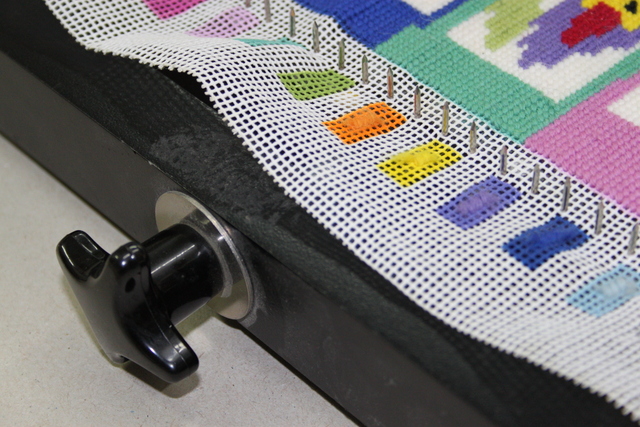
Then the tapestry is carefully linied up with the corresponding metal point on the other side of the rack.
Once this is achieved the screw can be slowly turned to add tension to the rack to straighten the tapestry. The back of the tapestry can be steamed or wettened slighlty to ease the stitchwork but care must be taken that all the threads are colourfast and that any water added to the image will not make the colour run on the stitches.
This is the end result for the tapestry above.
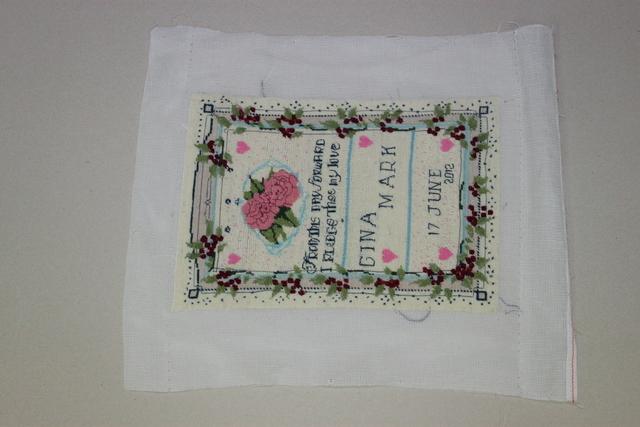
Here is the embroidery after using the tapestry straightening machine.
Now the embroidery or tapestry can be easily laced and stretched over the acid free board and is then ready for framing.
The signs are encouraging!
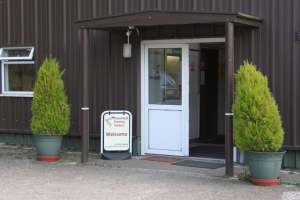
We are located out in the countryside and it can be a little tricky at the moment to find us. Therefore we are trying to get as many signs as possible to guide you to our workshop. There are some good instructions on how to find us on our contact page. However a new sign outside our building on the left hand side of the Buriton Business Park may help you to see exactly where we are.
This is our new sign and this is the view of it as you enter the Buriton Business Park.
Just come into the building on the left and you will be presented with a long corridor full of pictures on the walls. You may well see a few pictures you like along the way! Just follow the corridor along through the double doors and we are the last unit on the left hand side. We are also working on getting signs up on the main road but this could be a little while longer. However watch this space for more info!
Fitting oil paintings on canvas into frames
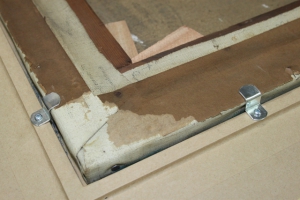
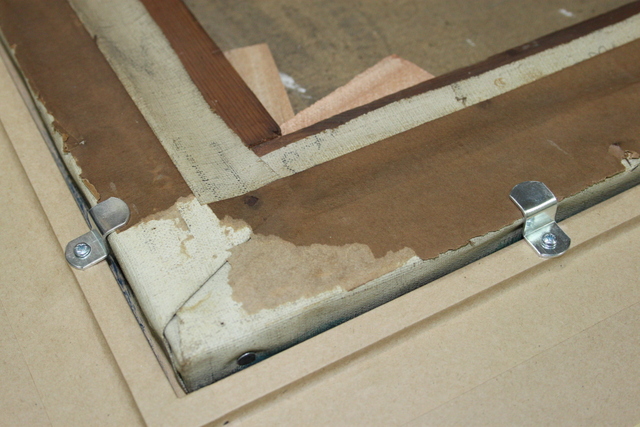
There are a number of ways to fit an oil painting on canvas stretcher bars into a frame. One of the main issues that frequently occurs is that the frame is often shallower than the canvas stretcher so the canvas will protrude from the back of the frame. I have seen many ways to overcome this problem including nailing straight through the canvas stretcher bars at an angle into the frame or bending nails over the back of the stretcher. Z clips are also a favourite which are both hammered into the side of the frame and the top of the canvas stretcher. All of these techniques run the risk of damaging the frame and more importantly the oil painting whilst nailing and leave permanent holes in the stretcher bars if the oil is removed from the frame (for restoration or varnishing for example). A relatively new technique has become available which uses a simple screw-in bracket and these are called canvas offsets.
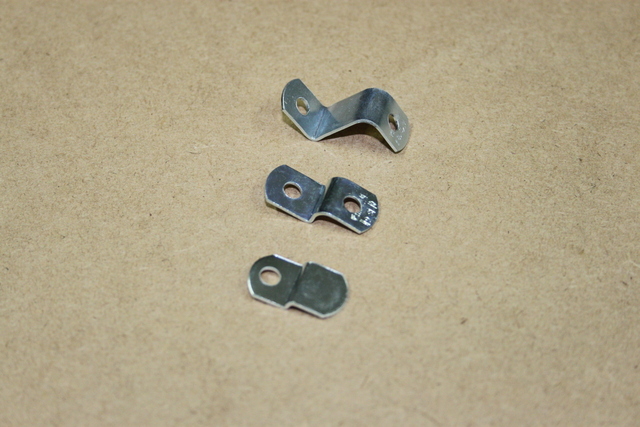
They are available in many different sizes but the great advantage is that they screw into the frame and can be easily reversed to take the oil painting out of the frame if needed. The canvas is completely secure and also there are no permanent nail holes through the canvas stretcher bars. Note the previous nail hole on this image to the right of the canvas offset shown.
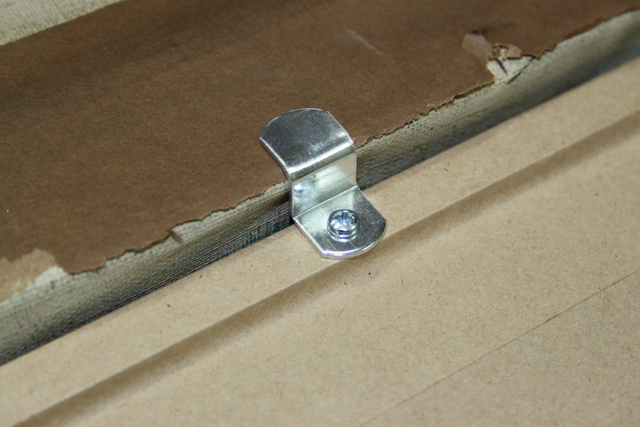
They are very easy to attach to the frame and only a couple on each side are needed. Also this technique is classed as a conservation technique as the oil painting can easily be returned to it's original state before it was framed. There is another brilliant advantage of this system for artists who have just painted their oils. The oil can be fitted into the frame (once touch dry) and then can be easily removed when the oil paints are dry enough for varnishing. This should be at least 6 months to a year after the last paint has been applied and then the oil can be easily removed, varnished and replaced with the minimum of hassle.
A really useful technique with the minimum of risk to the picture.